#FoodieFriday Fatty Cakes

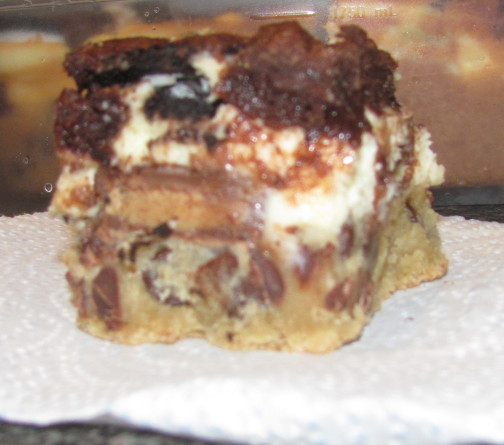
Meet the cousin of the slutty brownies — the Fatty Cakes! These thick, delicious bars are my brainchild, the culmination of my favorite treats. I unleashed a pan full of diabetes upon my coworkers around Thanksgiving last year, spreading love and calories to as many as I could. Let’s dissect these, shall we? You’ll be needing chocolate chip cookie dough, peanut butter cups, cheesecake filling, chocolate sandwich cookies, and brownie batter.

Chocolate Chip Cookie layer
2 1/2 cups flour (I used gluten free)
1 tsp baking powder
1/2 tsp baking soda
1/4 tsp salt
1 cup packed brown sugar
3/4 cups granulated sugar
1/2 cup butter, softened
1/2 cup canolia oil
2 large eggs
1/2 tbsp vanilla
12oz bag of semi-sweet chocolate chips

Sift together the flour, powder, soda, and salt, then set aside. Cream together the sugars, butter, and oil until smooth and creamy. Beat in the eggs and vanilla. Add the dry ingredients and mix until combine. Stir in the chocolate chips, then set aside.

Cheesecake Filling layer
2 8oz blocks of cream cheese, softened
2 large eggs, beaten
2/3 cups powdered sugar
1/3 cup heavy cream
1/2 tbsp vanilla

Beat together the cream cheese and eggs, then add the powdered sugar. Beat carefully until combine. Add the cream and vanilla, and beat until smooth and creamy. Set aside.

Brownie layer
A box of your favorite brownie mix (I use a gluten free mix)
1 large egg
1/2 cup canola oil
1/4 cup kahlua

Mix together all your ingredients until combine. If your batter seems too thin, add some water or increase the amount of brownie batter. Set aside.

To Assemble:

Preheat the oven to 350 degrees F. In a greased 9×13″ baking pan, press your cookie dough into the bottom of the pan. Arrange peanut butter cups into a 6 by 4 pattern (you’ll need 24 peanut butter cups). Smooth the cheesecake filling over the peanut butter cups. Arrange chocolate sandwich cookies into a 6 by 4 pattern (you’ll need 24 cookies). Cover the cookies with brownie batter. Pop that heavy pan into the oven and bake for 30 minutes. Allow them to cool for half an hour before refrigerating the pan. Let them set for another 30-60 minutes. Cut into 24 squares. Devour at your own risk!

IMG_2172

Share

#FoodieFriday Annaliesa’s Birthday Cake

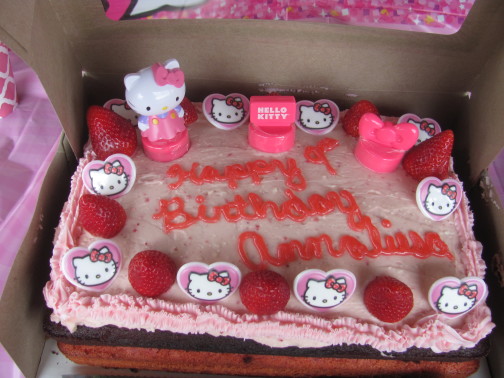
Over the past few years, my daughter’s been in love with strawberry cake and red velvet cake. Last year she requested a cake that matched the color scheme of an Easy Bake oven kit she had. I sandwiched layers of strawberry cake and red velvet cake with a cream cheese filling and iced them with a strawberry cream cheese frosting. The finished product? Divine. It’s a decadent cake fit for a princess.

Strawberry Cake Layer (Adapted from Annie’s Eats)
2 3/4 cups flour (I used a gluten free blend with xantham gum)
1 tbsp baking powder
1 tsp salt
1/2 cup unsalted sweet cream butter, melted
1/2 cup canola oil
2 1/4 cups granulated sugar
1 1/2 tsp pure vanilla extract
3 large eggs
2/3 cups milk (I used 1%)
1/3 cup buttermilk
2 1/2 cups strawberries, pureed
1 tsp pink coloring, if desired

Preheat the oven to 350 degrees F. Cream together your sugar, butter, and oil. Blend in the eggs and milks. Whisk in the vanilla, then incorporate the strawberry puree. If you’re adding the pink coloring, do so now. Add your dry ingredients and blend until combine. Pour the batter into a greased 9×13″ pan and bake for 30-40 minutes, until a knife or toothpick in the center comes out clean. Side aside to cool.

Red Velvet Cake layer (adapted from Annie’s Eats)
2 1/4 cup flour (I used a gluten free blend with xantham gum)
1 1/2 cup granulated sugar
1 tsp baking soda
2 tbsps cocoa powder
1 tsp salt
2 large eggs
1 1/2 cups canola oil
1 cup buttermilk
1 oz red food coloring
1 tsp pure vanilla extract
1/2 tbsp distilled white vinegar

Beat the eggs into the oil. Whisk in the buttermilk, sugar, and vanilla. Carefully add the cocoa powder and red food coloring — red food coloring will dye your skin for days if you’re not careful! Blend until combine. Add the flour and salt, blending until combine. Add the baking soda and vinegar together. Look at it bubble! Whisk it into the batter, then pour it into a greased 9×13″ baking pan. Bake for 30 minutes, then set aside to cool.

Cream Cheese Filling
2 80z blocks of cream cheese (full fat for a creamy, cheesecake-y delight)
1/2 cup butter, chopped
1 cup powdered sugar
1/2 tsp vanilla extract
A dash of salt

Beat together the cream cheese and butter until fully combined. Carefully add the powdered sugar to avoid puffs of sugar all over the place. Add your vanilla and salt once the sugar has been incorporated. Beat until fluffy, the set aside.

Strawberry Cream Cheese Frosting (adapted from Annie’s Eats)
2 8-oz blocks of cream cheese (again, full fat is best)
1/2 cup butter, chopped
1/2 cup strawberries, pureed
1 cup powdered sugar
1/2 tsp vanilla extract
A dash of salt

Beat together the cream cheese and butter until fully combined. Add the strawberry puree, incorporating it into a beautiful pink mixture. Carefully add the powdered sugar, beating until combine. Add the vanilla and salt, beat until fluffy, and set aside.

Now the fun part — assembly! Take your strawberry layer out of the cake pan carefully, placing it on a serving platter or cake board. Carefully smooth out the cream cheese filling over the cake. Carefully remove the red velvet layer from the pan, and place it on top of the cream cheese filling. Frost the top of the cake with your strawberry cream cheese frosting. If you’re not into the “naked cake” craze, frost the sides, too. Decorate your cake as you wish. Be sure to have plenty of help eating this gorgeous, rich cake. The layers are so moist and decadent, your mouth will think it’s died and gone to heaven!

IMG_2121

Share

#FoodieFriday Corned Beef & Cabbage

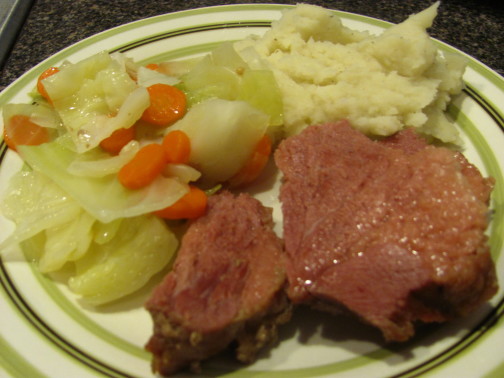
It’s a simple meal, really — especially if you purchase the vacuum sealed corned beef brisket with the little seasoning packet. Follow the directions. When you hit the one and a half hour mark, add peeled, sliced carrots and cubed cabbage to the pot. Simmer it for the last hour. I like to serve my corned beef and cabbage with mashed potatoes, so I dump them into their own pot. Rest the corned beef before slicing and serving. Build a delicious plate of traditional St. Patrick’s Day food here in the United States, and enjoy!

IMG_2113

Share

#FoodieFriday Waffles for Dinner

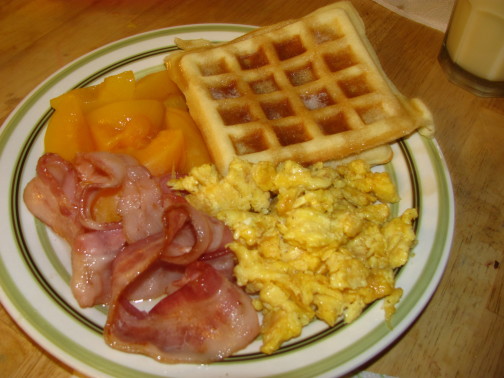
My daughter used some of her Christmas money to buy The Pioneer Woman Cooks: Dinnertime. She has become a big fan of Ree Drummond, and we’ve made The Bread to go with soup on several occasions. I got a waffle iron for Christmas, and I made some yeasted buttermilk waffles to break it in. My daughter was itching to make a batch of Ree’s waffles, though, so we had breakfast for dinner. Her separation of the yolks from the whites to make her waffles intrigued me, so I was definitely up for the task. Unfortunately, we found ourselves stuck at home with no baking powder, so I had to replace each teaspoon of baking powder with a 2:1 ratio of cream of tartar and baking soda. Also, the recipe just called for milk — I used buttermilk because I bought it thinking I needed it for the recipe. And the results…

IMG_2043

Delicious! We spread on butter and drizzled pancake syrup and served up some cheesy scrambled eggs, maple bacon, and sliced peaches to make it a full meal. Everyone enjoyed how much vanilla came through in each bite.

Share

#Cultivate16 Day 19: Foodie Friday

-People who love to eat are always the best people.- Julia Child
What would you like to make or eat this year? With whom?

I’d like to bake birthday cakes this year, just as I always do. I’d like to try my hand at the peanut butter cup cheesecake again, and sit with my family as we savor each creamy bite. I want to experiment with more recipes and cooking methods, and my favorite eating companions have always been my family. I’d love to meetup with friends, though. I’m hoping to go out for coffee and dessert with more than a couple of friends — because what could be better than caffeine and sugar with good company?

Don’t forget to share your responses by commenting here on the blog or using the hashtag #Cultivate16.

Share

#FoodieFriday 2016 Foodie Goals

The list is short and sweet. I’ve made it a tradition to bake the family’s birthday cakes, but I’ve never been a skilled cake decorator. This year’s goals may indicate I’d like to fix that:

Make and decorate my daughter’s 9th birthday cake
Make and decorate my oldest son’s 14th birthday cake
Make and decorate my husband’s birthday cake
Make and decorate my birthday cake
Make and decorate my youngest son’s 7th birthday cake
Master peanut butter cheesecake (probably hubby’s birthday cake)
Resume our “strawberry festival” Valentine’s Day tradition
Master the art of meal planning
Make several recipes I’ve pinned on Pinterest

Do you have any foodie goals for 2016?

Share

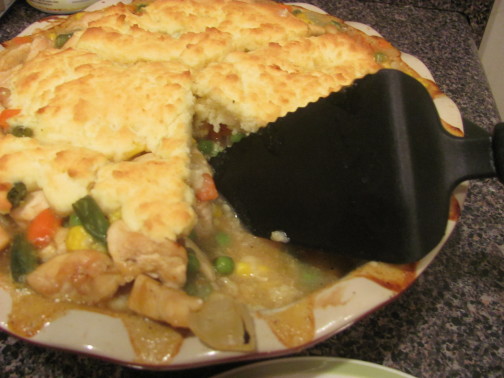
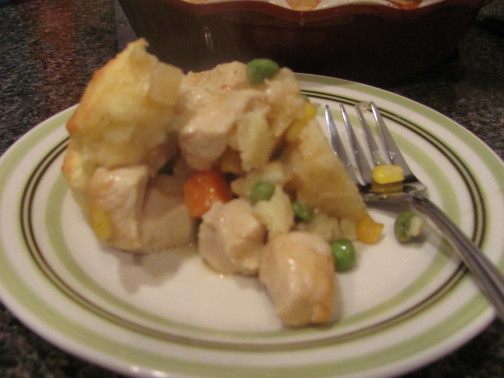
#FoodieFriday Biscuit Chicken Pot Pie

It’s been pretty chilly here this weekend, thanks to a gorgeous cold front sucking up moisture from the hurricane stalled out along the Atlantic coast. These conditions inspired me to bake up a pot pie, but I’ve never been great at making pie crusts. This is where I cheated and used the pizza crust recipe on the side of a gluten free Bisquick box. Okay, so I doctored it up a bit, and I’ve used my doctored up recipe to make breakfast pizza before. But seriously, it’s like a biscuit in crust format! Sooo good!

For the crust:

1 1/3 cup gluten free Bisquick
1/2 cup milk
1/3 cup melted butter
2 large eggs, beaten

For the filling:

3 boneless, skinless chicken breasts, diced
1 12-oz bag of frozen mixed veggies, thawed
1/2 onion, diced
1 15-oz can lower sodium chicken broth
1/3 cup wine (whatever kind you’d like, or omit if you don’t)
2 tbsps cornstarch
Salt, pepper, onion powder, and garlic powder to taste

Preheat your oven to 400 degrees F. Grease a pie plate and set aside. Spray or grease a large pan and caramelize the diced onion.  Next, add the chicken and cook until no longer pink. Dump in the veggies and pour in the wine. Bring to a simmer. Add your seasonings, cornstarch, and chicken broth. Bring to a simmer, stirring frequently to prevent clumps from forming. Mix bisquick and wet ingredients until combined. Divide into two pieces. Spread your bottom layer into the pie plate. Pour in the filling. (Pro-tip: if you happen to have leftover mashed potatoes in your fridge, spread the over the bottom layer before pouring in your filling. Trust me.) Cover the top of the pie with the remaining dough — don’t worry about looks here. Bake for 15-20 minutes until crust is golden brown.

IMG_1714

IMG_1713

Share

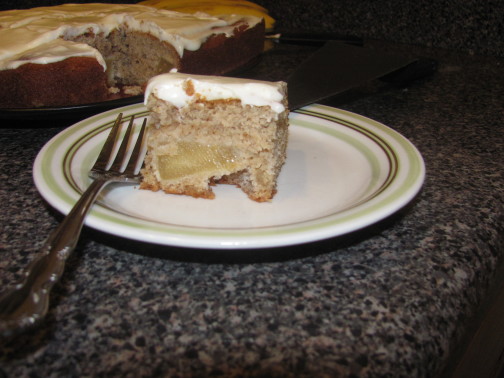
#FoodieFriday Apple Cake with Caramel Cream Cheese Frosting

In honor of autumn, I decided to make a simple apple cake with a caramel cream cheese frosting. The recipe is simple…

1 box yellow cake mix (I used Betty Crocker’s gluten free)
1/4 cup softened butter
1/4 cup coconut oil (can be replaced with butter or other oil of your choosing)
3 large eggs
1 can apple pie filling
1/2 tsp cinnamon
1/4 tsp cloves
1/4 tsp nutmeg
a splash of vanilla extract

Bake according to the package. Allow to cool for at least 10-15 minutes. While you’re waiting for your cake to cool, whip up a batch of easy caramel cream cheese frosting!

8 oz cream cheese
4 oz butter (1/4 cup/ half a stick)
2/3 cups powdered sugar
1 tsp vanilla extract
2 tbsps caramel sauce/ topping

Beat the cream cheese and butter until smooth. Carefully beat in the powdered sugar and vanilla until thoroughly combined. Beat in the caramel sauce on high until smooth and fluffy. Spread over your cooled cake. Cut a slice and enjoy!

IMG_1703

Share